

(Recipe adapted from Milk Street)
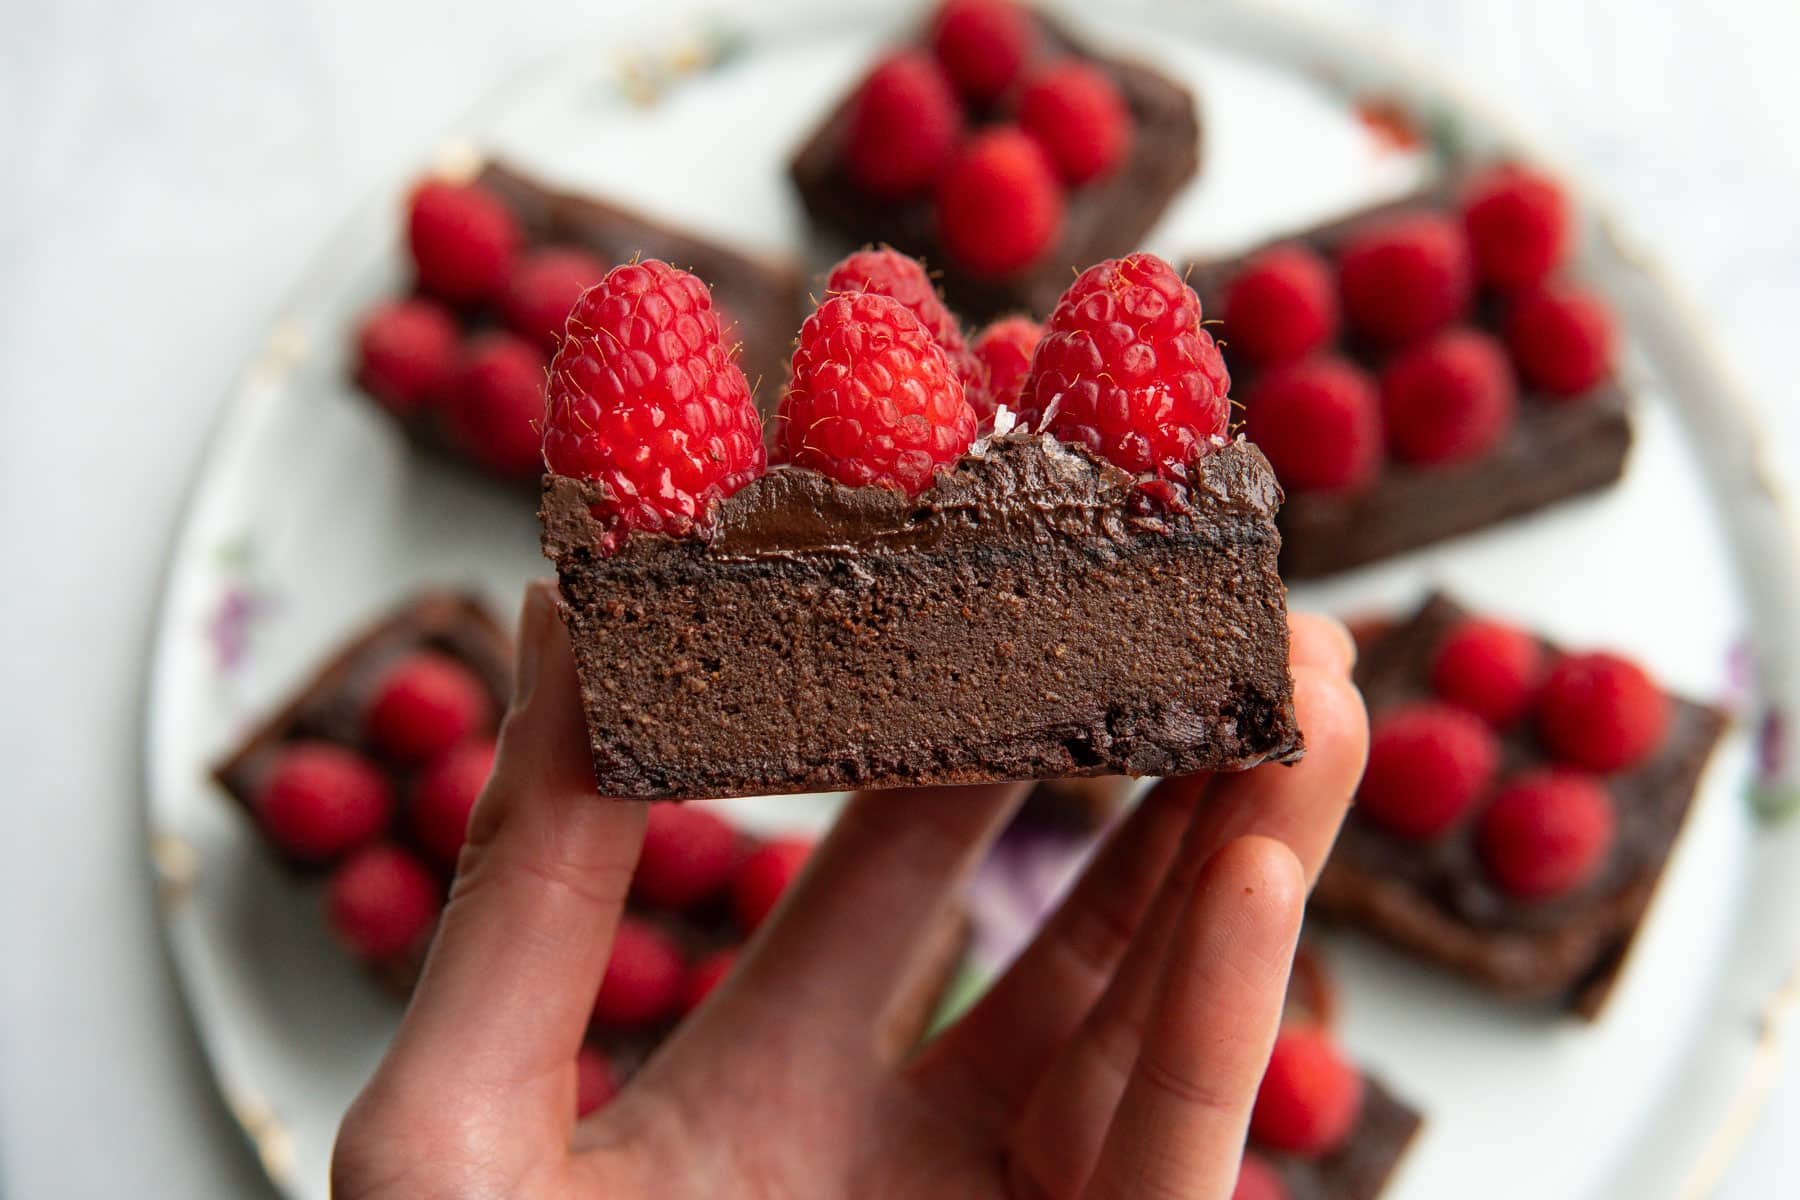
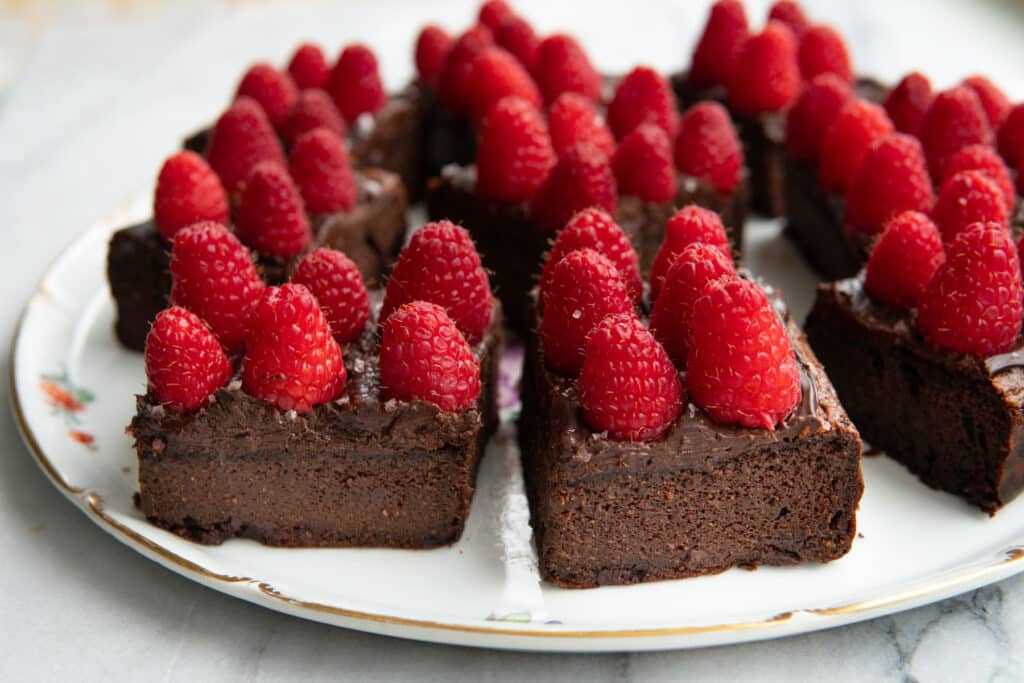
If you love chocolate cake, but not the kind that is way too sweet, heavy, and not chocolate-y enough, then this cake is for YOU! Plus, it all comes together in the blender. The cake has no flour and gets its structure from ground up almonds, eggs, and cocoa powder. This combo plus milk and butter results in an incredibly moist and almost fudgy texture without feeling too heavy. It’s so easy to make and so delicious – it might become your new go-to chocolate cake!
Ingredient highlight
Chocolate! Chocolate and cocoa powder are made from the beans found in the fruit of a cacao tree that are roasted and ground. The darker the chocolate, the lower the sugar and the more cacao. Cacao is high in minerals like iron, magnesium, and zinc. It’s also high in antioxidants like flavanols, polyphenols, and theobromine.

 Servings 9 squares
 Prep Time 10 minutes
  Cook Time 35 minutes
 Ingredients
For the cake:
- ¾ cup (112g) raw or roasted almonds
- 1 cup whole milk
- ½ cup coconut sugar
- 6 tbsp (85g) butter, melted
- ½ cup (43g) unsweetened cocoa powder
- 2 tsp baking powder
- 1 tsp kosher salt
- ½ tsp vanilla extract
- 4 large eggs
- ½ heaping cup chopped dark chocolate, chocolate chips or chunks*
For the glaze:**
- ½ cup finely chopped dark chocolate, chocolate chips or chunks
- ¼ cup heavy cream or unsweetened full-fat coconut milk
Topping ideas:**
- Chopped almonds
- Cacao nibs
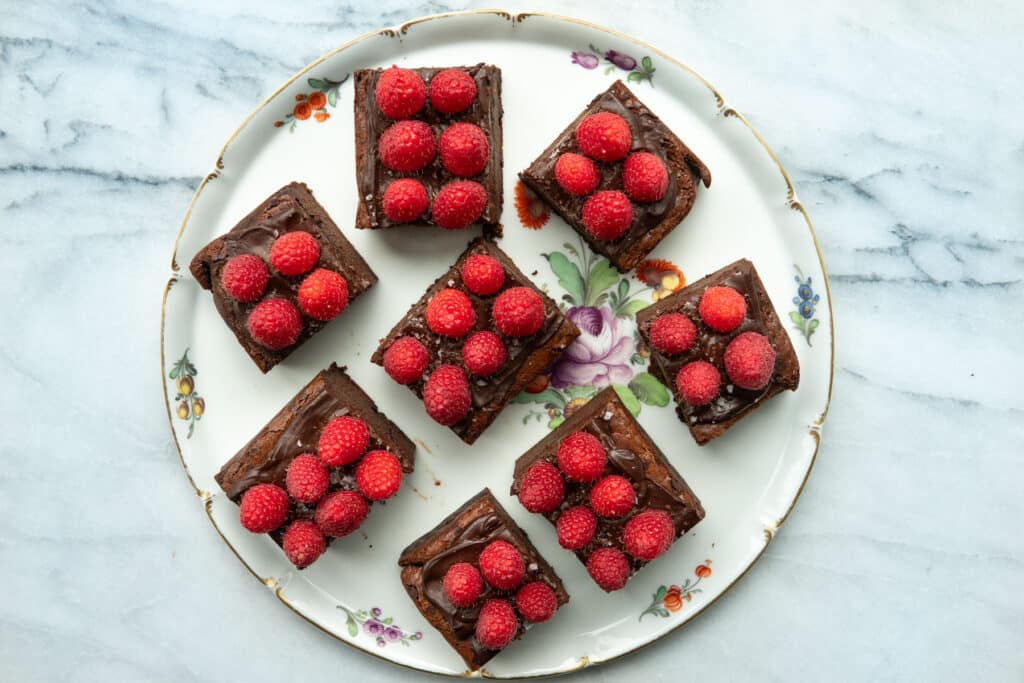
- Raspberries
- Sprinkles
- Flaky salt
- *I used my favorite (2.8 oz) dark chocolate bar and roughly chopped it.
- **You could also just make these with no glaze or toppings for more of a simple brownie-like experience. Can’t go wrong!
- Make it a round cake! ~ You could also bake this in a 9-inch springform pan for a more classic cake.
- Note: ~ my scale is being very finicky so I wasn’t able to provide metric measurements for all ingredients. Will update when I can!
Instructions
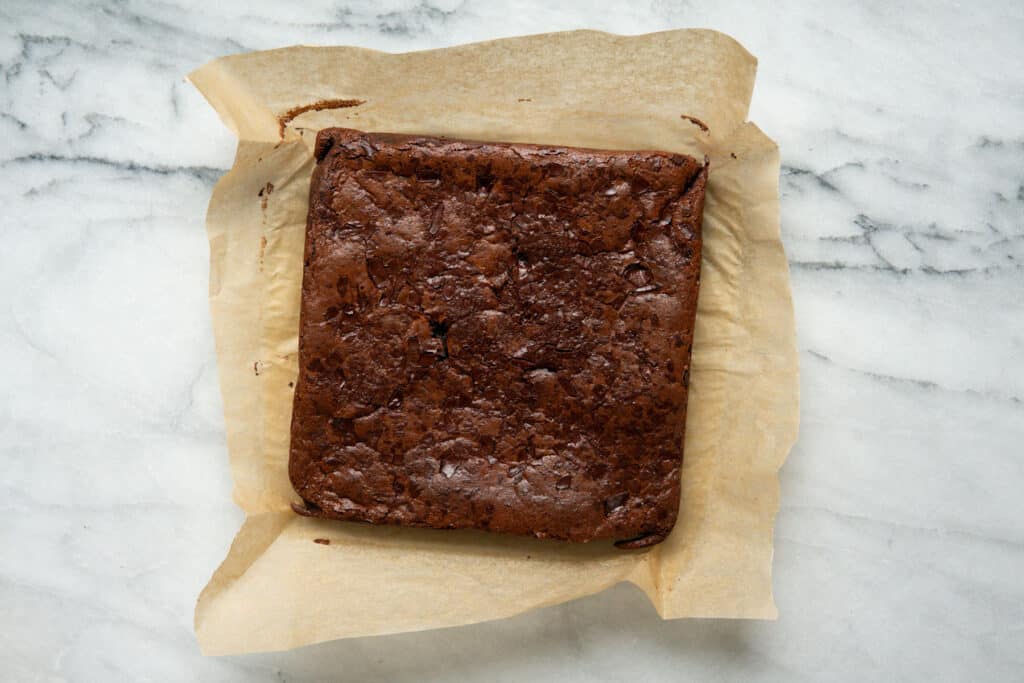
- Preheat the oven to 350F. Line an 8×8 or 9×9-inch baking dish with parchment paper.
- In a high-speed blender, add the almonds and blend into a fine meal. Scrape under the blade to loosen anything stuck down there.
- Add the milk, sugar, butter, cocoa powder, baking powder, salt, vanilla, and eggs. Blend until very smooth, scraping anything stuck to the sides as needed.
- ransfer to the baking dish (the mixture will be very liquidy). Sprinkle the chocolate evenly over top (it may sink to the bottom, that’s fine!). Carefully transfer to the oven and bake for 30-35 minutes or until a knife comes out clean in the center. It’s best to let the cake cool completely before glazing so that it doesn’t stick/seep into the cake, but I’m never that patient so I just let it cool for an hour, then glaze it.
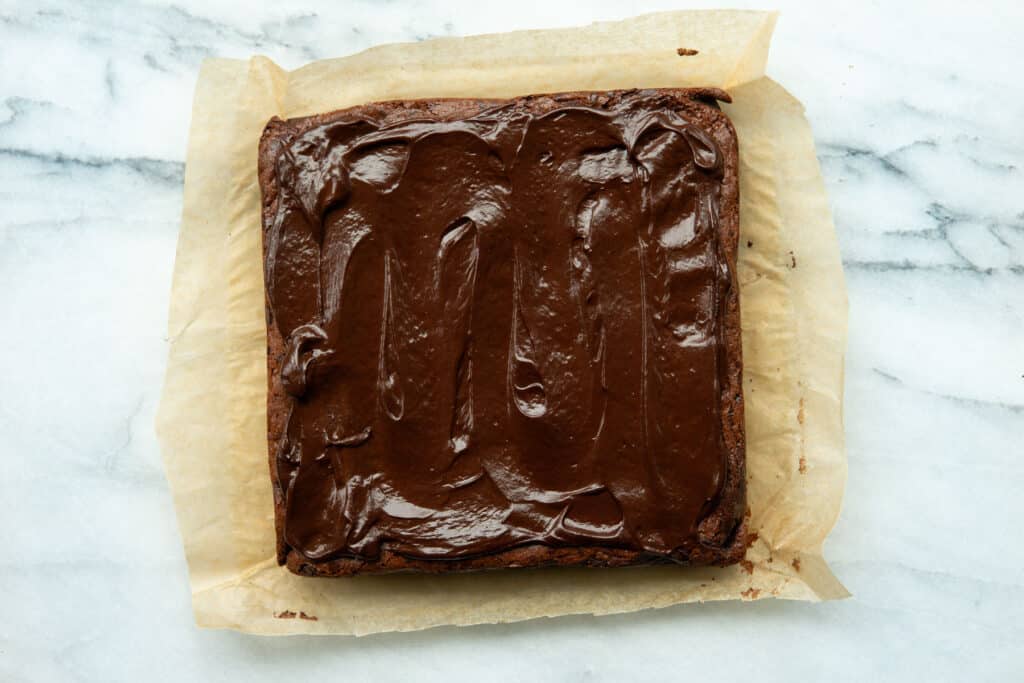
- To make the glaze: In a medium microwavable bowl, add the chocolate chips and cream or coconut milk. Microwave in 15 second intervals, stirring thoroughly after each time, until smooth (usually takes two 15 second zaps). If the glaze is too runny, let it cool until it is more spreadable.
- Transfer the glaze in the center of the cooled cake and spread around with the back of a spoon or rubber spatula. Top immediately with your desired toppings so that they stick. You can slice it right away, but it’s best to let the glaze cool off/solidify, about 15-30 minutes longer if you can wait!
- We liked the cake best cold straight out of the fridge for a fudgier texture.
Items you can prep ahead (optional)
- Make and bake the cake early in the morning or a day ahead.
- Glaze and top the cake.
Substitutions:
- To make dairy-free, use an alternative milk in place of whole milk. Use 5 tablespoons of olive oil in place of the butter.
- I don’t think this can be made vegan, since the eggs are essential to the structure of the cake. You could try a vegan liquid egg substitute.
Storage:
- Store leftovers in an airtight container in the fridge for up to 6 days or freeze for up to 2 months.
Leftovers + Repurposing:
- This cake is best at room temperature or cold, depending on your preference. We both preferred it cold for a fudgier texture.
- If eating from the freezer, let it sit out for 30 minutes to 1 hour to thaw.


leave your comments!